Offline Translation
Project files can be downloaded for offline translation. Translators will be able to download files only if the project manager enables downloads in the Project Settings.
Downloading Files
You can download each file separately (in original or XLIFF format), download filtered strings (in XLIFF format), or download all files for a specific language (in original or XLIFF format). It could be done via the Editor or the language page.
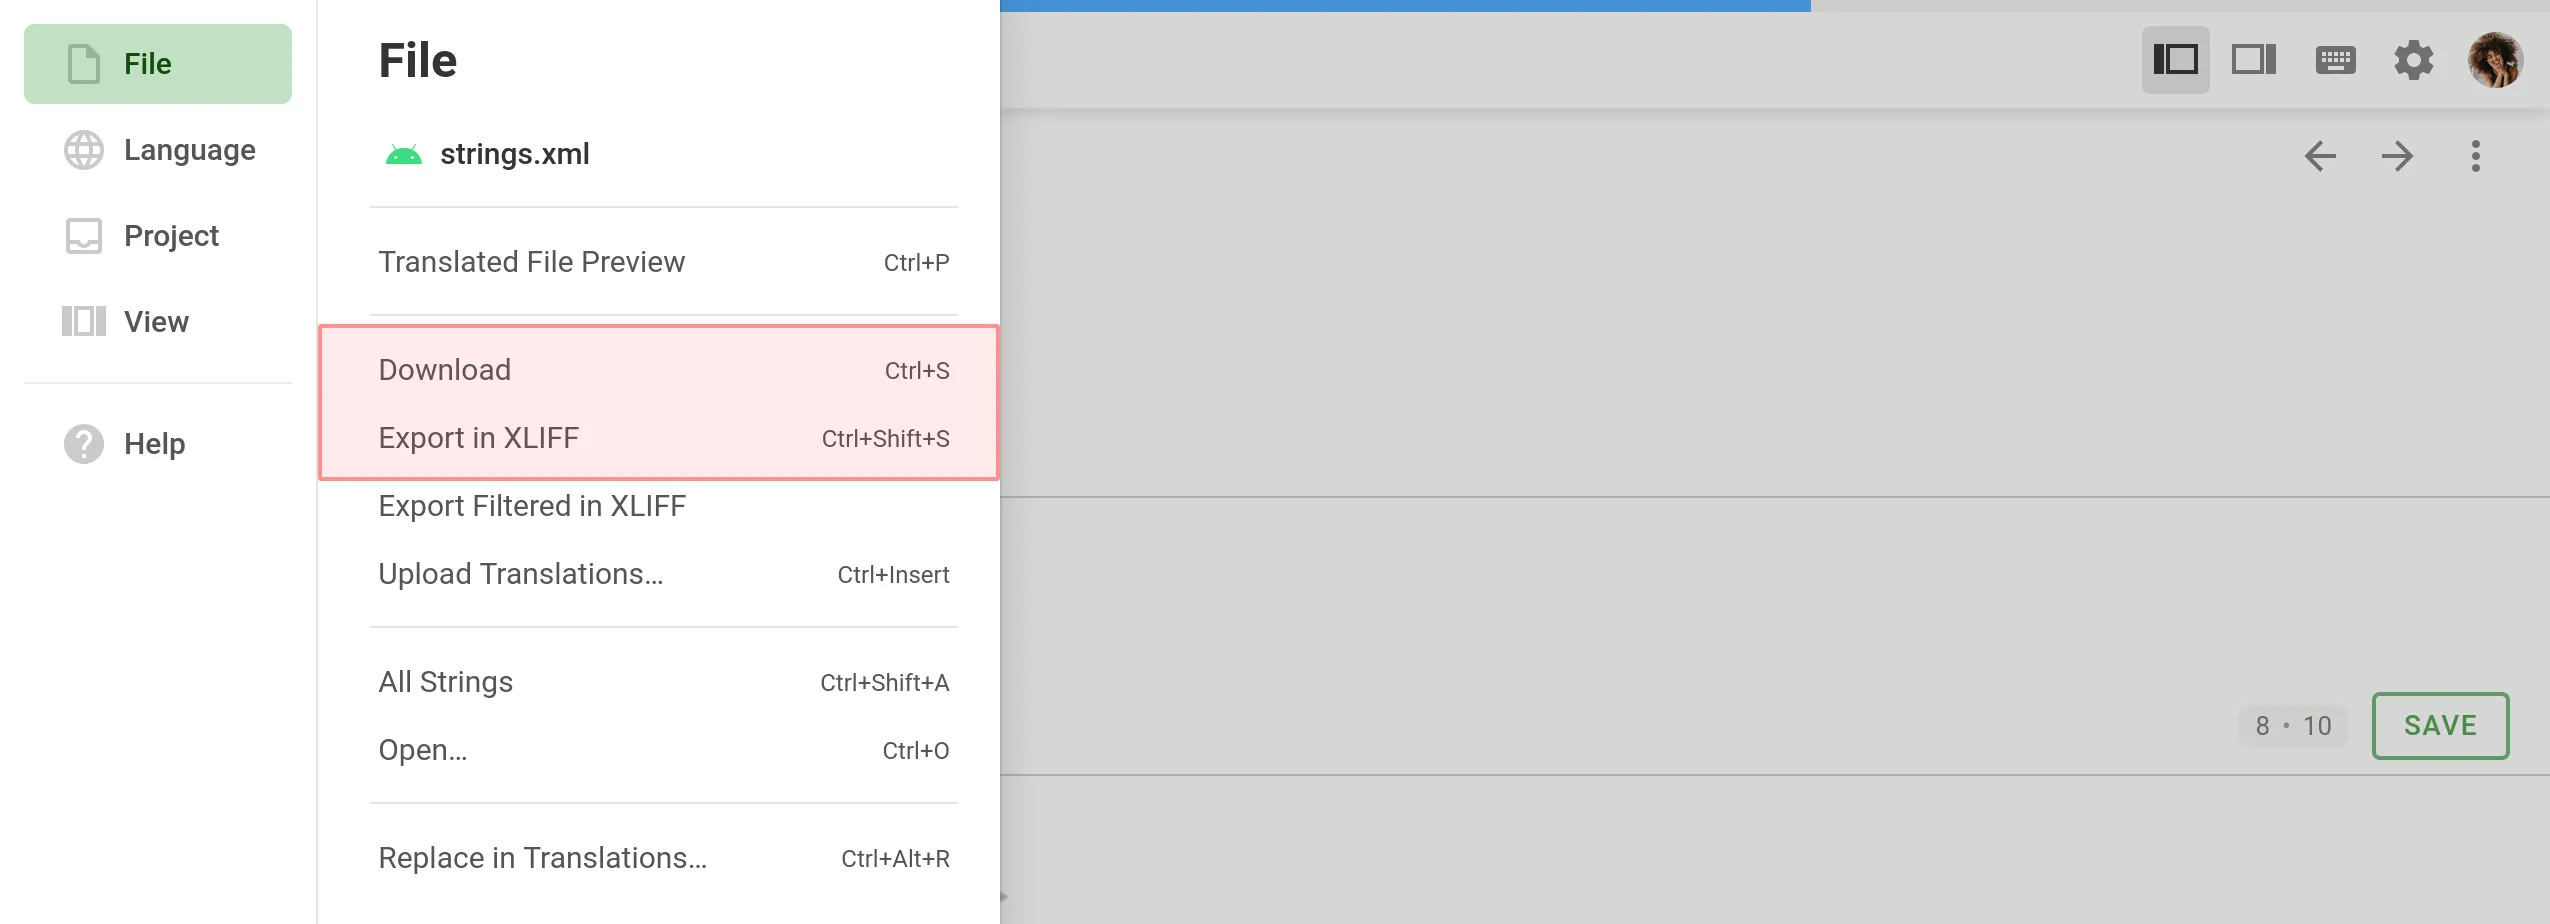
Downloading a Single File via Editor
To download a single file to translate offline, follow these steps:
- Open the necessary file in the Editor.
- Click on the Main menu in the upper-left corner.
- In the File menu, select Download or Export in XLIFF.

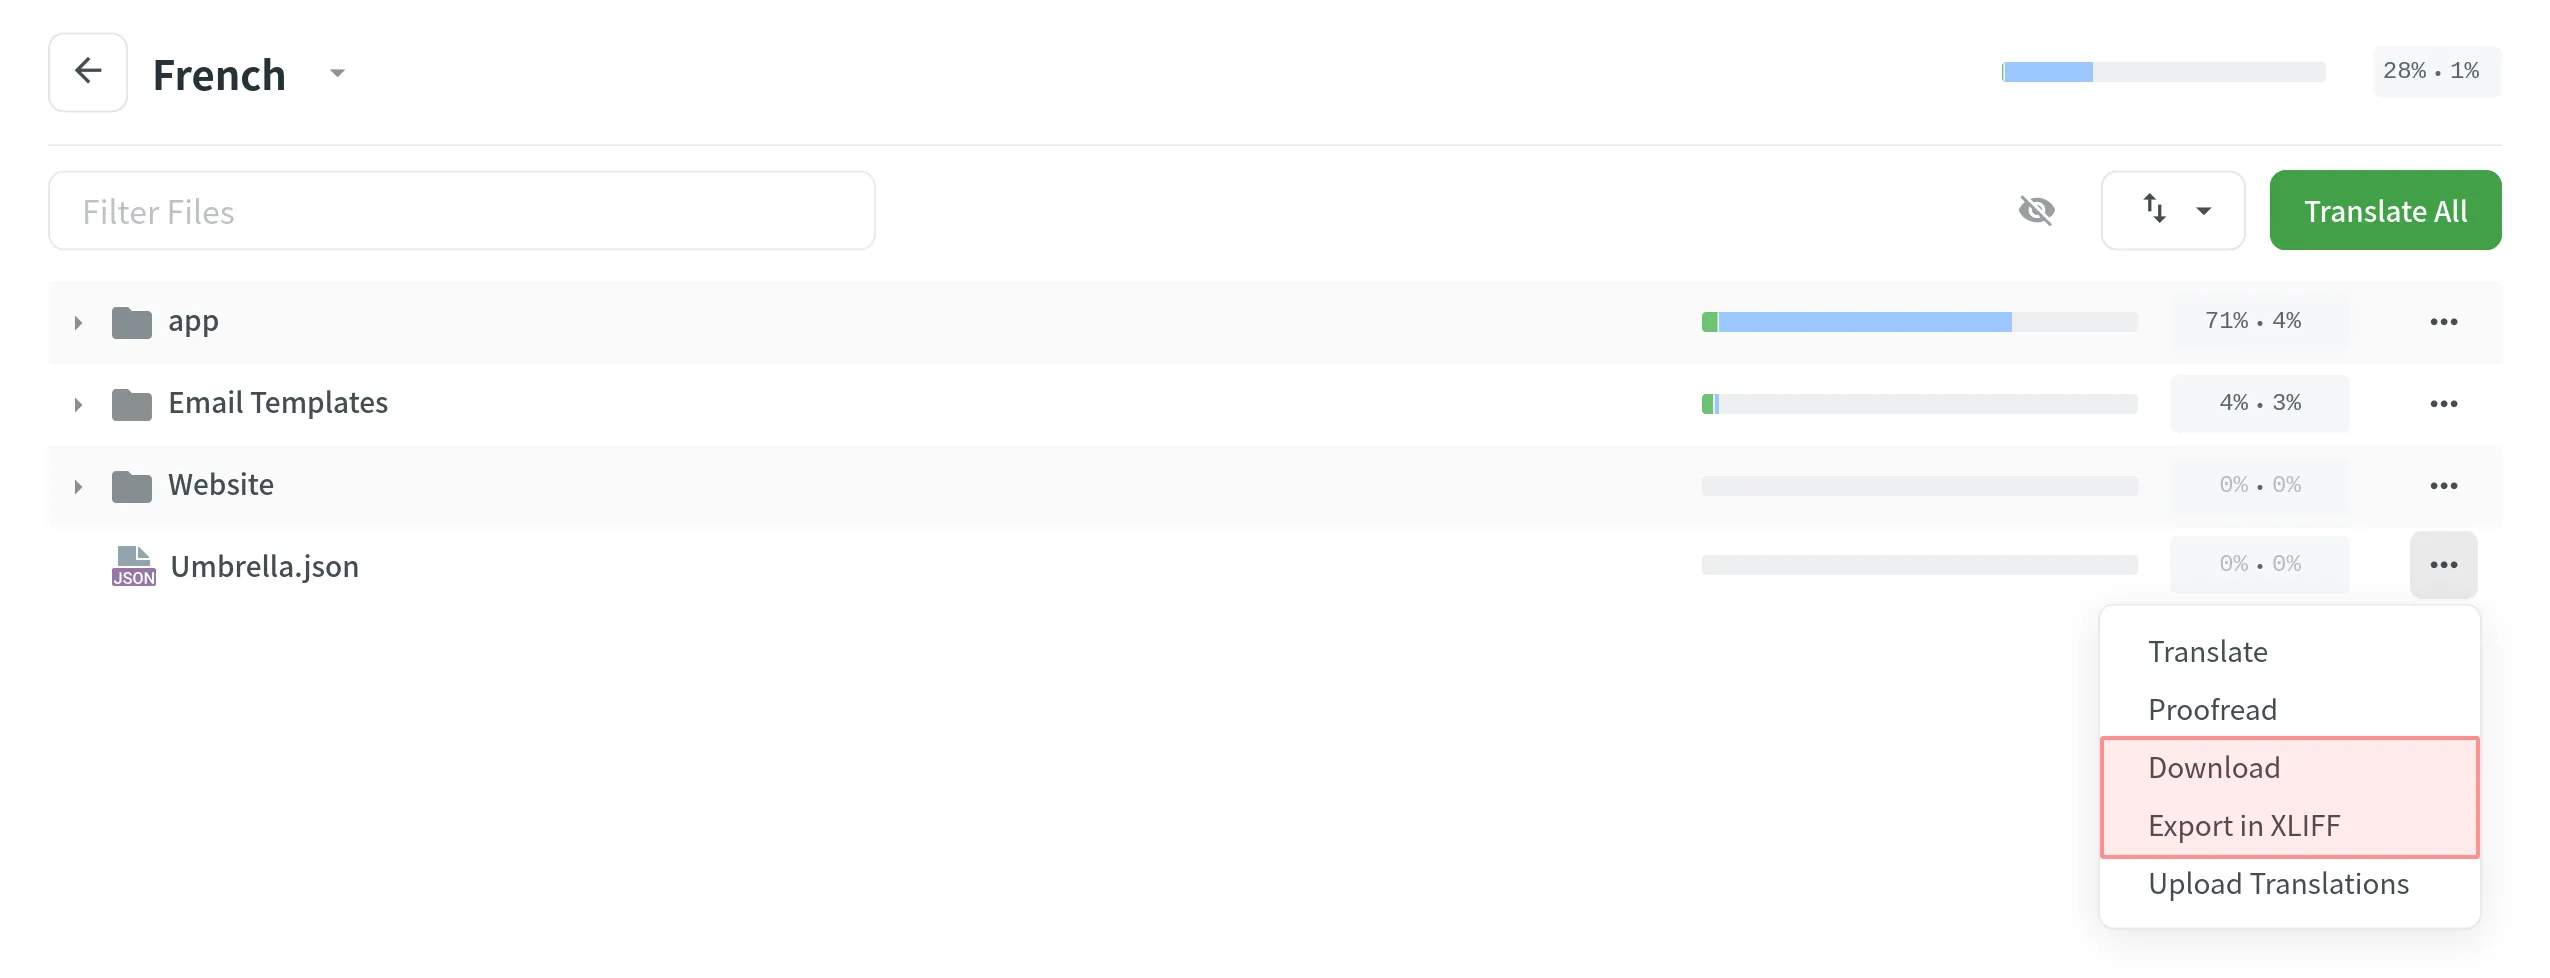
Downloading a Single File via Language Page
- Open your project and select a language.
- Click toward the file that should be downloaded.
- Select Download or Export in XLIFF.

Downloading All Files for a Specific Language
To download all the project files for a specific language, follow these steps:
- Open your project and select a language.
- Click .
- Select Download translations or Export in XLIFF.

Using the Download translations option, you will get a ZIP archive with all the project files containing translations in an original format. The Download option is useful in case you want to test the product’s localized version.
Using Export in XLIFF, you will get all the source strings and completed translations in a single XLIFF file. This way is more convenient, as it doesn’t require opening each file separately to translate. XLIFF files are supported by the majority of desktop localization tools.
Downloading Filtered Strings in XLIFF
There are cases when it’s necessary to download strings based on some specific criteria. For example, you might want to download strings translated by some specific project member, or only untranslated strings, or only strings with comments.
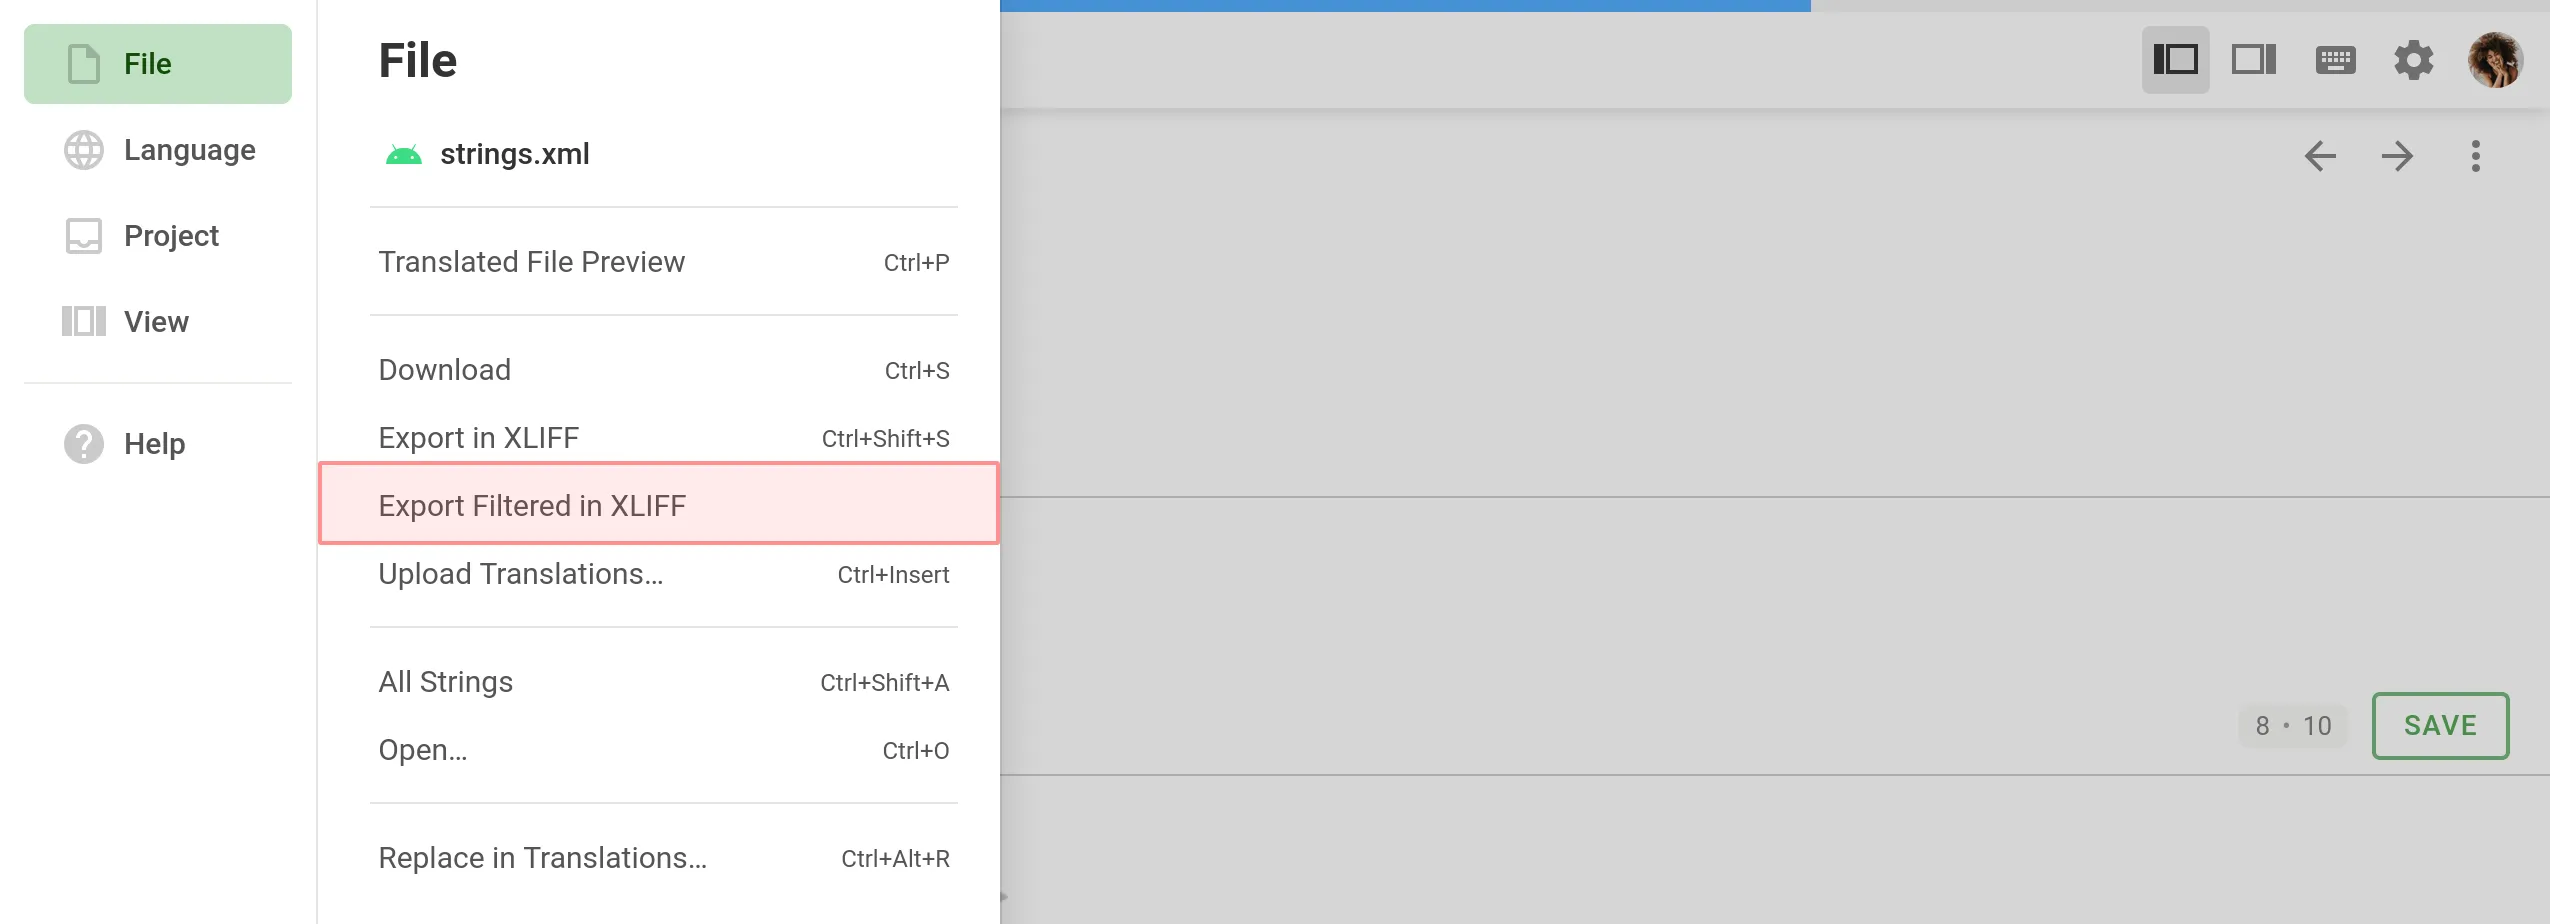
To download filtered strings, follow these steps:
- Open the necessary file in the Editor.
- Filter strings based on some specific criteria.
- Click on the Main menu in the upper-left corner.
- In the File menu, select Export Filtered in XLIFF.

Read more about Online Editor.
Uploading Translations
You can upload completed translations (in original or XLIFF format) via the Editor or the language page.
Uploading Translations via Editor
To upload a file with translations, follow these steps:
- Open the necessary file in the Editor.
- Click on the Main menu in the upper-left corner.
- In the File menu, select Upload Translations.

- Configure the Advanced Import Settings toward the uploaded translations.
- Click Select File.
- Select a file with translations on your machine and click Open.
Read more about Online Editor.
Uploading Translations via Language Page
- Open your project and select a language.
- Click toward the file translations should be uploaded to.
- Select Upload Translations.

- Configure the Advanced Import Settings toward the uploaded translations.
- Click Select File.
- Select a file with translations on your machine and click Open.
Uploading XLIFF Translations
Once you’ve finished translating an XLIFF file earlier exported from your project, you can upload completed translations back to Crowdin.
XLIFF file with translations can be uploaded the following way:
- Open your project and select a language.
- Click .
- Select Upload XLIFF Translations.

- Configure the Advanced Import Settings toward the uploaded translations.
- Click Select File.
- Select an XLIFF file with translations on your machine and click Open.
Advanced Import Settings
By default, translations that match the original strings and translations identical to the existing ones are skipped during the upload. Configure the system behavior by selecting suitable options in the appeared dialog.
Common Questions
My XLIFF file was translated offline. Now It contains finished translations, but when I try to upload it back to Crowdin, the translations are not displayed in the project. What might be the reason?
According to the official documentation, <target> elements in the XLIFF file contain the state attribute that indicates the current translation state for each string.
When you export XLIFF files from Crowdin for offline translation, each of the <target> nodes will contain a state attribute with the respectful value. Below you can see the possible values:
needs-translation– the segment needs translation.translated– the segment was translated.final– the segment was translated and approved.
Usually, offline CAT tools that support the XLIFF file format automatically change the state for each string on export.
Though, if your CAT tool doesn’t change the state attribute for translated strings automatically or translations are done manually in the Notepad, it would be necessary to manually change the state attribute in your XLIFF file to the translated or final value to be sure that translations will be successfully uploaded to Crowdin.