Organization Members
Managing organization users in Crowdin Enterprise involves various operations such as managing permissions, adding to teams, contacting users, and deleting users. Below you can find instructions for each operation.
Viewing and Searching Users
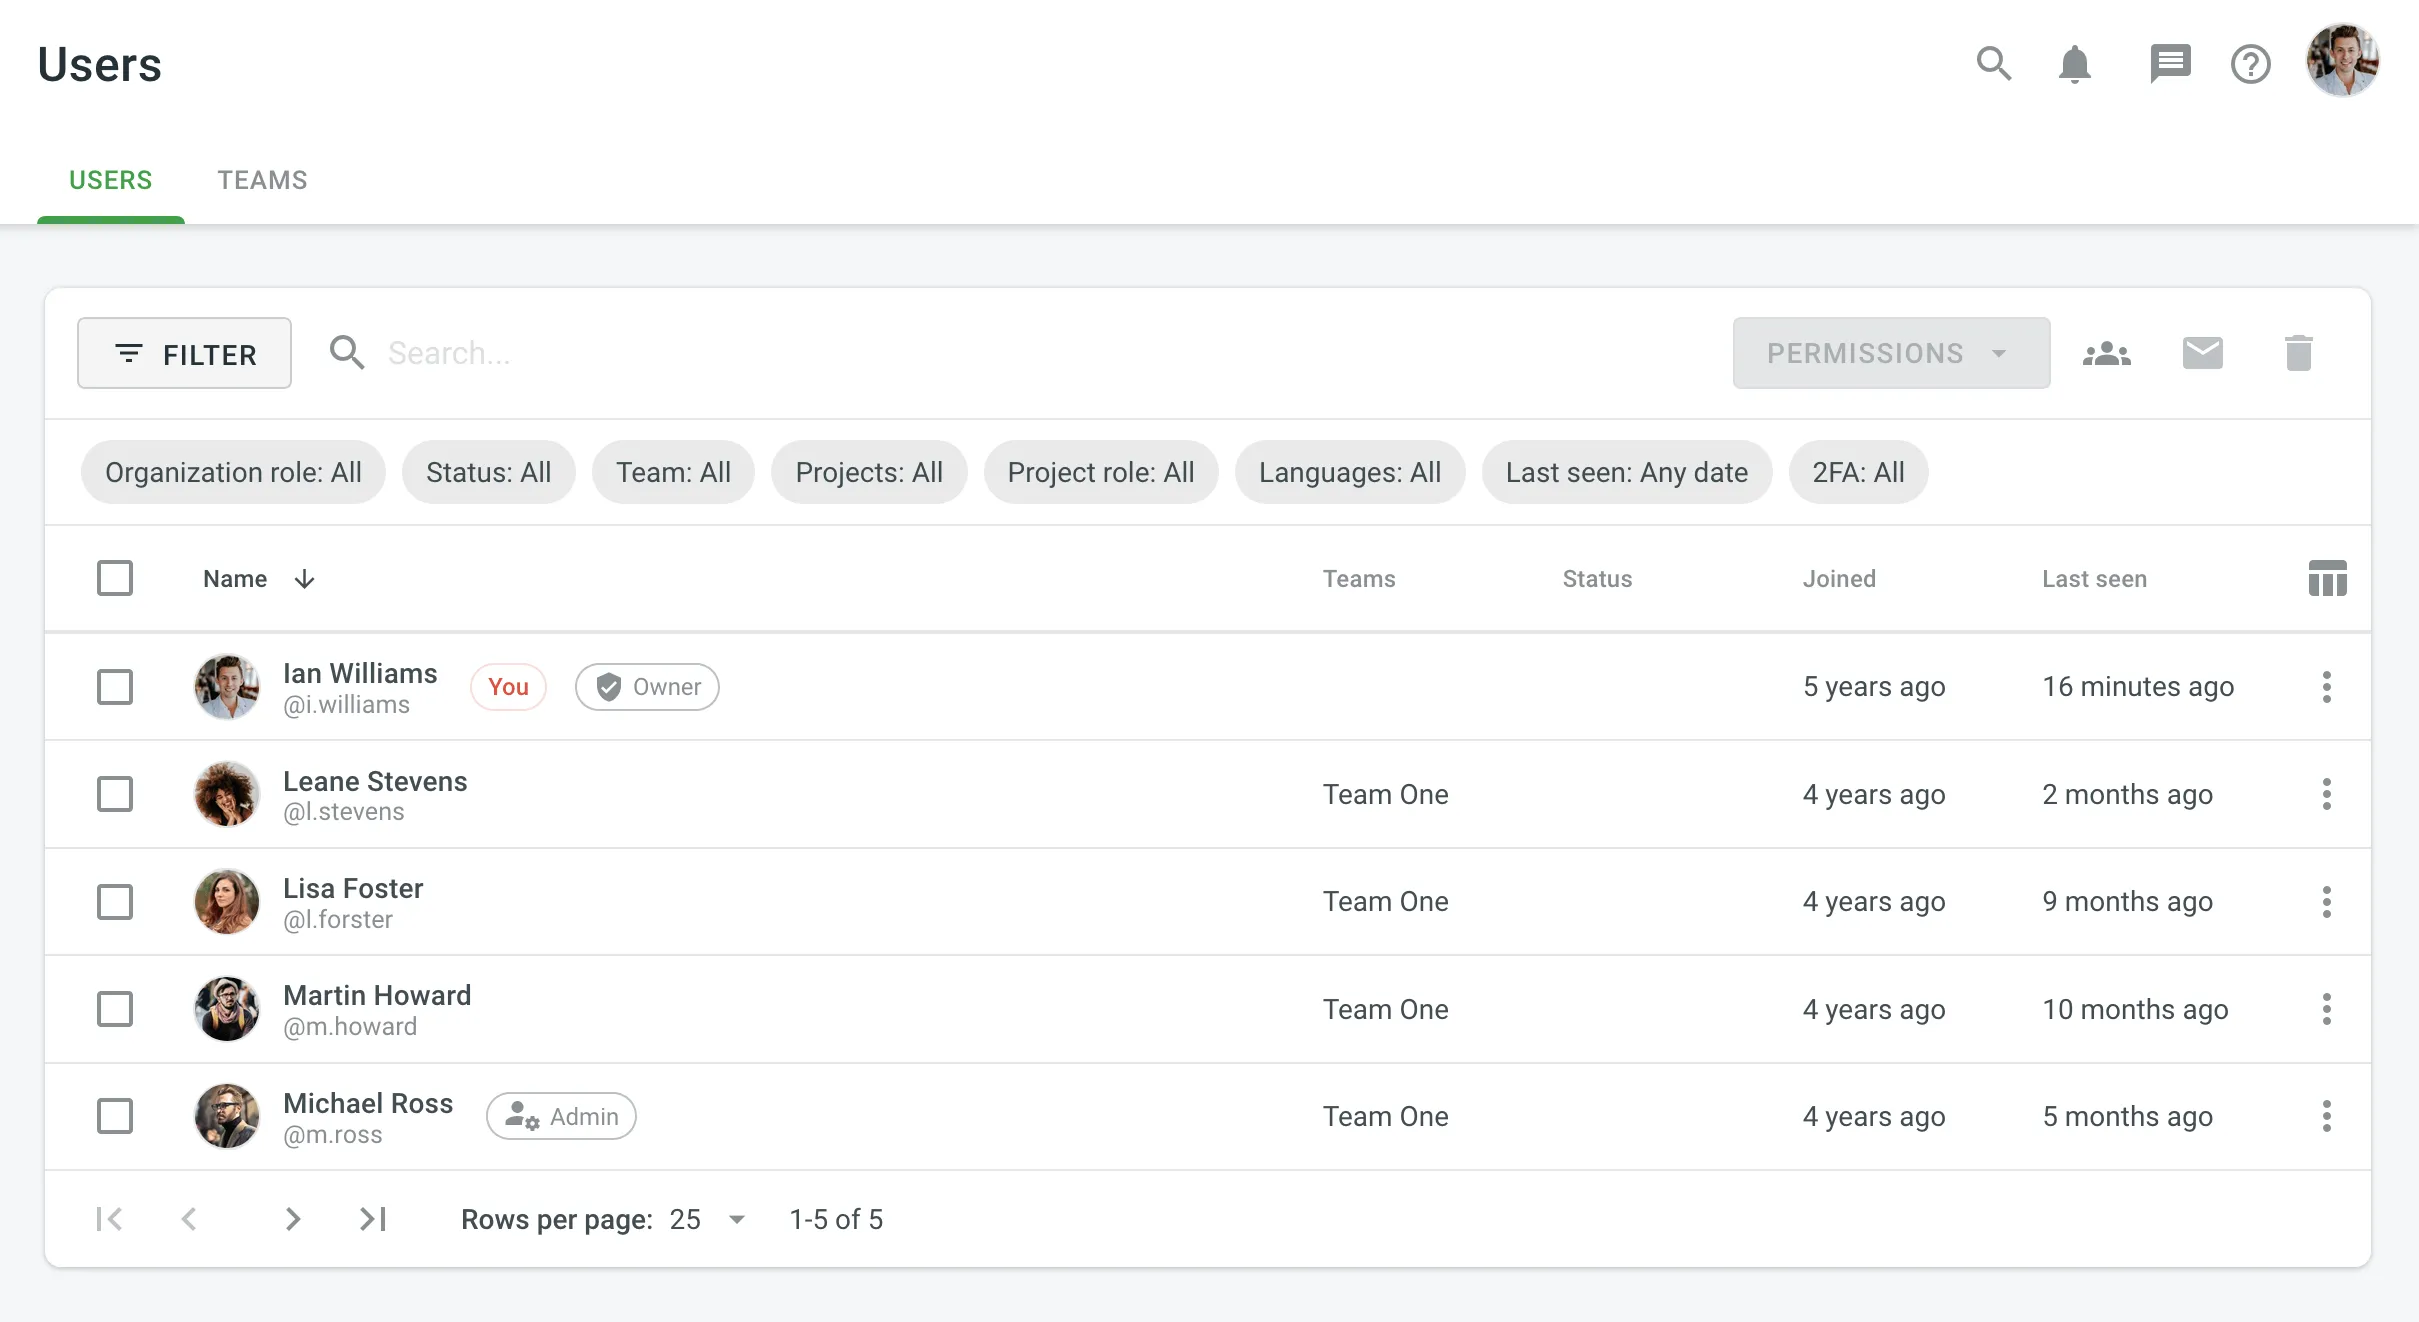
Once you open the Users page, you can view and search for users in the Users tab.
You can view the list of organization users (one user per row) with the following details:
- Name
- Teams
- Status
- Joined
- Last seen
By default, all users are displayed in the Users tab. To filter users displayed, click and use the available filter options:
- Organization role: All, Admin, Manager, Vendor, Client.
- Status: All, Active, Pending, Blocked.
- Team: All, particular team.
- Projects: All, particular project.
- Project role: All, Manager, Developer, Translator, Proofreader, Language Coordinator, Member.
- Languages: All, particular language.
- Last seen: Any date, custom range.
- 2FA: All, Two-factor authentication enabled, Two-factor authentication disabled.
To search for a particular user, type their first name, last name, or username in the Search field.
To change the sorting order, click once or twice on one of the following column headings:
- Name
- Status
- Joined
- Last seen

Viewing User Profile
To view and manage user profiles, follow these steps:
- Open your organization’s Workspace and select Users on the left sidebar.
- Double-click on the user or right-click and select Profile from the menu.
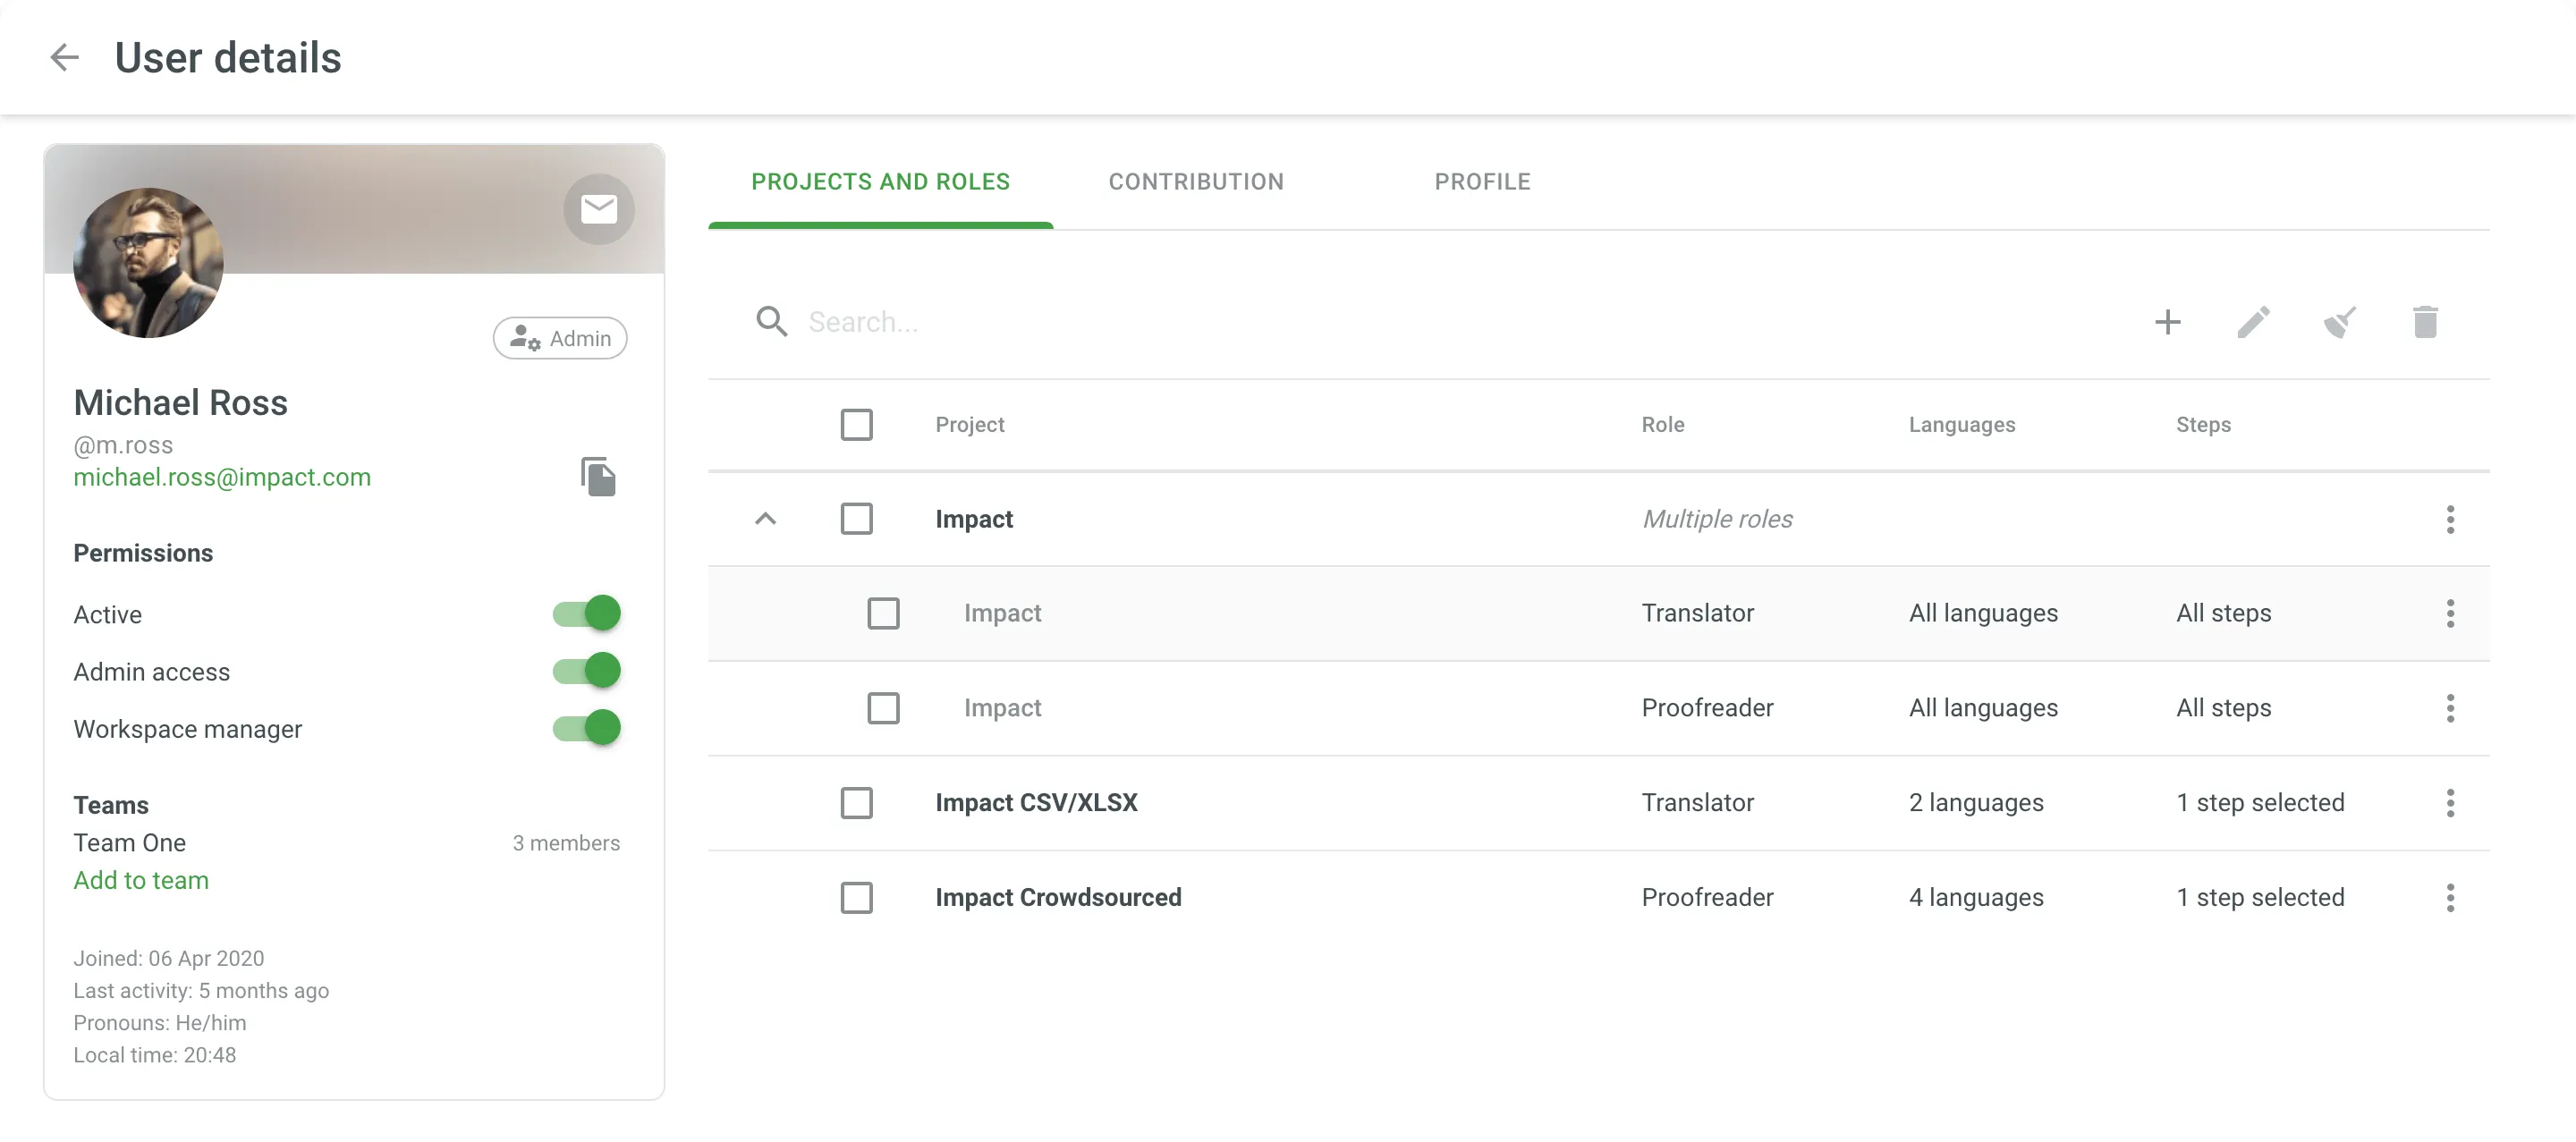
- In the user profile, you can perform various actions:
- Projects and Roles: Add, edit, clear, or delete project permissions.
- Groups: (only for Permission granularity mode) view and manage the groups which are managed by a user.
- Contribution: View and delete the user’s contributions across the organization.
- Profile: View and edit the user’s name, surname, pronouns, and time zone.
- Use the left panel to contact the user, view basic information, permissions, team memberships, joining date, last activity, pronouns, and local time.

Changing Permissions
To change user permissions, follow these steps:
- Open your organization’s Workspace and select Users on the left sidebar.
- Select one or multiple users for which you want to change the permissions.
- Click Permissions in the upper-right corner or right-click on the user and change Permissions from the menu.
- Modify the permissions as needed:
- Add or remove project permissions.
- Enable or disable admin access.
- Block or unblock the user.
Adding to Team
To add users to a team, follow these steps:
- Open your organization’s Workspace and select Users on the left sidebar.
- Select one or multiple users that you want to add to a team.
- Click Add to team or right-click on the selected users and select Add to team from the menu.
- Select the team to which you want to add the users.
Contacting Users
To contact users, follow these steps:
- Open your organization’s Workspace and select Users on the left sidebar.
- Select one or multiple users that you want to contact.
- Click Contact or right-click on the selected users and select Contact from the menu.
- Compose your message and send it.
Deleting Users
To delete users from the organization, follow these steps:
- Open your organization’s Workspace and select Users on the left sidebar.
- Select one or multiple users that you want to delete.
- Click or right-click on the selected users and select Delete from the menu.
- Confirm the deletion.